How To Remove An Expired Exchange 2007/ 2010 Certificate and Create A New Certificate
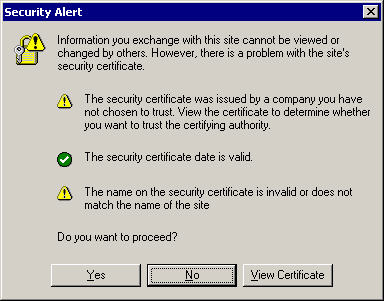
When you start Outlook you may receive a message from your outlook clients that the certificate is no longer valid. This is down to your self signed certificates expiring. A self signed certificate is used so that the Exchange server and the Outlook client trust each other and can connect without any issues.
We need to remove the expired certificate from Exchange 2007 or Exchange 2010 and then create a new certificate and allocate the correct services to the new certificate. There are two ways we can do this, this guide will show you how to remove the current expired certificate and create a new self signed, the other option is to remove the certificate with the guide below and then use a certificate from a trusted certificate authority such as GoDaddy. I recommend you use a certificate from a trusted CA.
OK so lets first Identify the expired certificate. We do this by running the following command.
Get-ExchangeCertificate |FL
This will show a screen similar to the below, search for the date that is expired I have high lighted it below. Also copy and paste the “Thumbprint” to notepad , as we will need that.
As you can see, this cert has expired so we need to remove it. To do so run the command below. Replacing the thumbprint with YOUR thumbprint.
remove-ExchangeCertificate -Thumbprint "2342342342334234
Once done we now need to create a new certificate. You can create a UCC certificate request on GoDaddy and import a purchased certificate ( recommended ) or you can create a self signed certificate with the command below.
New-ExchangeCertificate
This will create a new certificate for you, we now need this thumbprint so we can allocate a service to it. so enter again..
Get-ExchangeCertificate
Again make a note of your new thumbprint.
Now we are going to allocate the service to the new certificate. To do this we run the command below each time for each service. So run it for “Smtp”,”IIS”,”IMAP” and “POP” if you require it. Remember to replace the thumbprint with the one you copied to notepad earlier.
Enable-ExchangeCertificate -Thumbprint "234234234234234234" -Service "IMAP"
You wil get asked if you would like all services to go on this certificate select “A” and it will allocate the services. If you want to allocate the services manually then run the above command again for each service, IIS,POP,SMTP or IMAP.
Here is how to setup an SSL Certificate in Exchange 2013.


Allen White
| #
Thanks, glad you like it. Book mark to keep updated!
Thanks
Allen
Reply
Bill
| #
This was just what I needed and worked the first time!
Thanks!
Reply
Allen White
| #
Glad to help bill.
Reply
mitch
| #
Thank you very much for the service provided it seems to have helped me and much appreciated for your help
Reply
Allen White
| #
Glad to help Mitch share the site!
Reply
Dana
| #
thanks for the clearer version of the post compared to many other sites i’ve found. i’m still having my users get a prompt though. is it possible because the server also has certificates for it’s ip address for a service that isn’t exchange or a certificate because i’ve also set it up as my self-signing CA?
Reply