
Step By Step Guide To Migrating To SBS 2011
In this example, I will be migrating a production server 2003 to SBS 2011, however the process is identical if you were migrating from all previous Windows operating systems. The process includes preparation of the existing network, the new server, migration of data including log on scripts and finally the retirement of the old server.
Migration Prerequisites
First things first TAKE A FULL backup. It is never wise to start a migration unless you are 100% sure that you have a backup to fall back to in the event of a failure of the migration. This is not an invasive migration however all it technically does is update the schema and then move the FSMO roles.However take a backup!.
Download power shell 2.0 and Microsoft Baseline Configuration Analyzer for your OS and install them onto your existing server. Links are below. Note after the prerequisites have been ran you will require a reboot of the existing server.
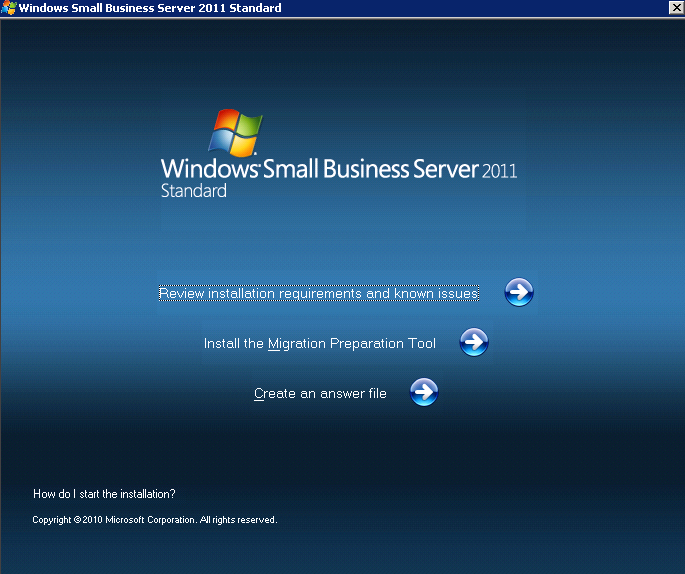
To start, insert your SBS 2011 DVD into the existing domain controller. You will see the SBS 2011 splash screen as seen below.
Then select “Install the Migration Preparation Tool”
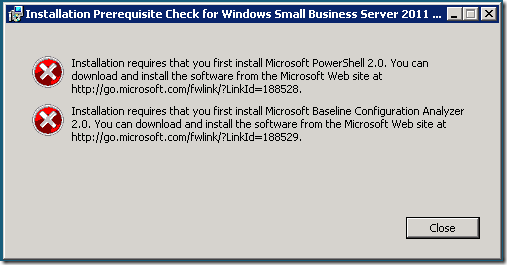
During the install, if you see the error below, it is because you have not downloaded Powershell 2.0 and Microsoft Baseline Configuration Analyzer, see the links here or above.
Next of all you get prompted to get the latest updates for the existing operating system. This is only important if you are keeping your server after the migration. So, if you are, then run the updates.If not then do not download and updates and continue.
Now, in the background the system runs an update of the active directory schema. This takes you from your current schema version to version 47 ( the same as server 2008 R2).
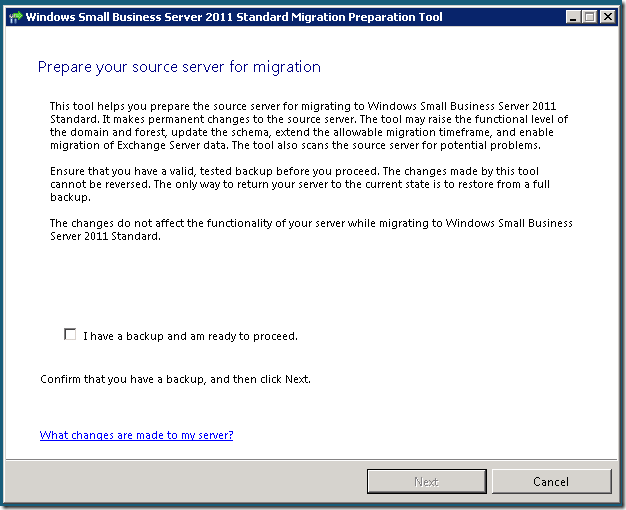
The screen below appears during this, again warning you of the importance’s of taking a backup and giving you information on what it is doing such as updating the schema and raising the domain levels.
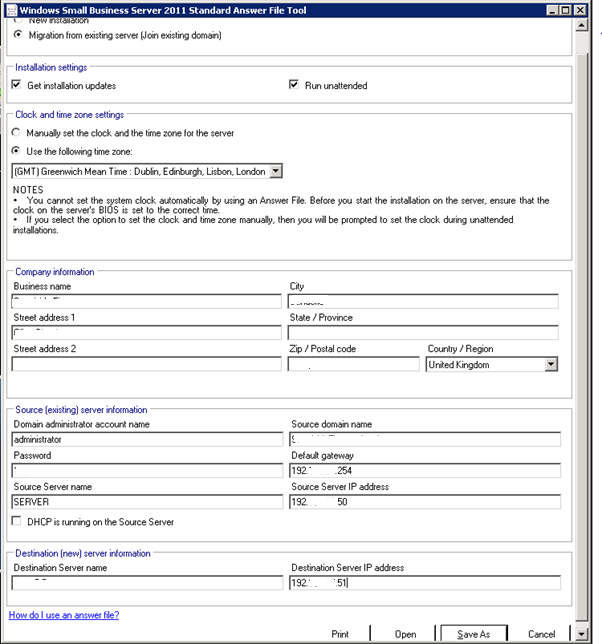
When it completes you get the option of reading the migration guide on the DVD or going to the latest sbs 2011 migration guide online. Tick the box and and the click Create an answer file. We will now proceed to create an answer file for the migration to sbs 2011.
You will see the wizard as seen below. Enter your details, then double check them again before saving the file to a USB key or drive.
Make sure that you save the SBSAnswerFile.XML file it creates to the root of your USB device. The server may now request a reboot. Please do so.
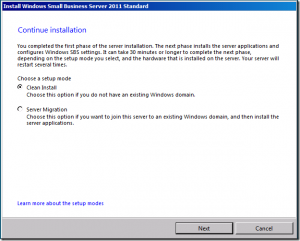
Once the server reboots we will now move across to your new server. Insert the SBS 2011 DVD and boot from it. You will go through the usual Microsoft process of selecting what drive to install to etc, then you get to this screen where we use the answer file we have just created.
Select “Server Migration“. You may see a warning which basically warns you about task that may need completing withing 21 day.Accept and continue.
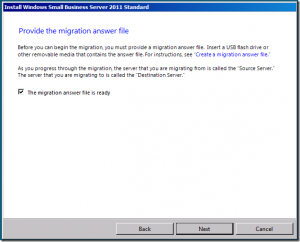
You will then see this screen asking you for your answer file.Tell the system the answer file is ready (make sure your USB key is inserted) and then click next.
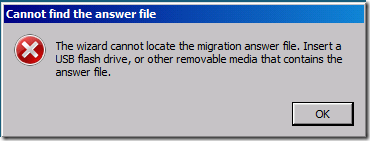
If you see the screen below, then the system has not detected your USB key or drive. Reboot the server and after the system has started to boot (passed the attempt to boot from CD), insert your key so windows can detect it.The system will reboot and should automatically detect the answer file.
Now that the system has accepted the SBSAnswerFile.xml it will continue and attempt to talk to the existing server and domain.It is at this point you may sometimes see an error stating that “The username and password are incorrect “this is a time issue where the time in the bios is wrong on the new server. here is my article on how to resolve this.
http://www.techieshelp.com/sbs2011-migration-incorrect-username-password-or-domain-incorrect/
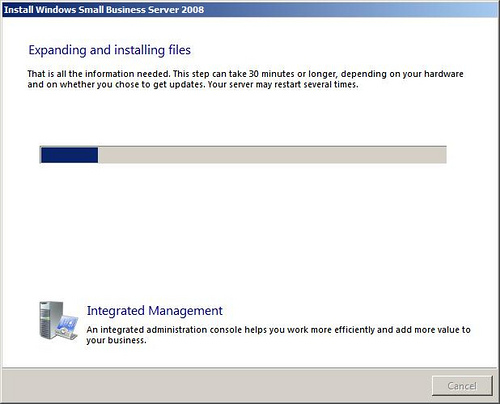
If not then the system will continue to extract and install SBS 2011. Be warned this can take over an hour even though it states 30 minutes!
Once this is done it will download and apply the latest updates and reboot. Make sure the USB key is not in as it will try and boot from it.
Upon this reboot it will ask you to enter your license key for SBS 2011, do so. It will then continue to extract and install.
At this point I have seen the following error where it states “FATAL:Cannot DCPromo to domain”. This is an RPC error. If you save and check the logs you will see this error.
1727 The remote procedure call failed and did not execute.
This is normally down to a firewall such as ISA blocking RPC traffic, Disable or modify the firewall rule and then continue the SBS 2011 install by going to c:>program files>Windows Small Business Server>bin and the rerun the sbsetup.exe. (this will continue the sbs 2011 install from where it failed).
If you did not get that error then great, lets move on.At this point the new server is being promoted to a domain controller and has the FSMO roles migrated to the new server.
Again, the system will continue to install files etc (it is actually installing exchange 2010). Once complete it will reboot and allow you to log onto your new SBS 2011 server.
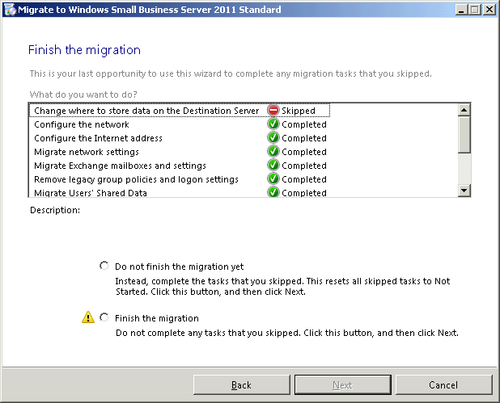
The next stage is to do with an earlier message saying you have 21 days to complete certain tasks. They are nothing tasks really. Work through them accordingly.Some of the tasks may not be applicable to you. The data one is useless as it just basically tells you to migrate your data.
Migrating your Data from your Old Server to SBS 2011
Here is how I would migrate your data from your old server to your new SBS 2011 server.
Map a drive on the new server to the drive that holds the data on the old server. I’m going to use an xcopy command that basically takes the whole drive and moves it to the new drive. If you would like to move folder by folder the simply creating the folders on the new data volume then move into the folder and run the xcopy command
xcopy x:\*.* e:\*.* /D /E /C /F /H /K /O /Y
Where X is the old drive and E is the new drive.This will copy the whole drive
If you are migrating folder by folder then do the following.This will copy individual folder by folder.I prefer this as it means no expired data is moving.
xcopy x:\oldfolder e:\newfolder /D /E /C /F /H /K /O /Y
You could also obviously use the copy and paste feature from the GUI.
Once done, you WILL need to share the folders again and check the permissions on the folders. Check the NTFS permissions have came across.
If you use log in scripts to map drives, you will now need to open up the log in scripts and modify them.
They are normally stored on c:\windows\sysvol\domain\scripts
Change the scripts from ..
Net use f:\\oldserver\data
To
Net use f:\newserver\data
That should be your data taken care of.
Active Directory Changes
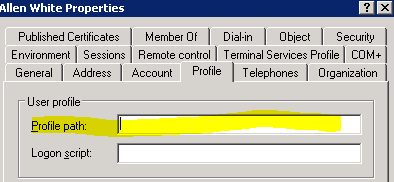
If your users use roaming profiles then you will have moved that data as well. We need to change the profile pointers in active directory to mirror this.
So, in active directory users and computers locate your users profiles and change the following value by selecting properties then profile.Make sure you set it to the new path on your new server.
We have moved files, so now its printers
As you are most likely going from 32bit to 64bit , download the latest drivers, recreate the ip ports on the sbs server and then share off the printer. Then either map your clients to them or distribute via GPO as seen my my colleagues site here.
http://www.petenetlive.com/KB/Article/0000492.htm
Now that printers are done, data and users we can look at removing the old server
Retiring Your Old Server
We will need check that your FSMO roles have moved so drop to command line and run
netdom query fsmo
Make sure all of the roles now say the host name of your new server.
On your old server now run the command below.
DCPROMO
Follow the wizard to remove this as a domain controller. The only options you will get are to put a local password on the system. Continue.
Once the old server reboots you can do as you please with it.
Final Notes
Install your backup software and get a backup ASAP and also pop on your anti virus software.
Tags: migration







knev
| #
I need to test this method, will this cause any issues with security related. means any special permission user holds will be lost during this migration ?
Reply
Allen White
| #
I presume you are talking about the data migration?
There are no securty issues as the /O – Copies file ownership and ACL information.
So all permissions are retained.
Hope this helps.
Allen
Reply
Allen
| #
How do you configure the ip setup in both machines when migrating from sbs2003 (2 nics sbs2003 1 ip to the internet and the otherlocal ip sending dhcp to the local network) ..Will the new destination server sbs2011 have the same configuration as before..My users connect to exchange by using outlook web access with the external ip address…Allen
Reply
Allen White
| #
That is how we used to setup 2003 sbs as we used Isa in those days, now just use 1 nic or team your nics in the new serv er then give it an ip, subnet and point the gateway to your firewall.Set DNS as local and the existing sbs 2003 until its retired, in the DNS console set your isp`s forwarders.
Allen
Reply
behnam
| #
thank you again please keep up the good work
Reply