Veeam 7 Restoring Exchange Email Items
In this guide I will take you through restoring email from your Exchange server (2007, 2010 and 2013) using Veeam 7 . It is a very simple process and it can also be as granular as you like, from a whole mailbox store restore to an individual mailbox, a folder in a mailbox and even an individual email restore with Veeam 7.
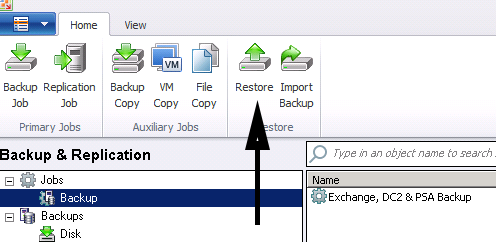
To start fire up the Veeam 7 backup and replication console. Once we are in there we need to select restore.
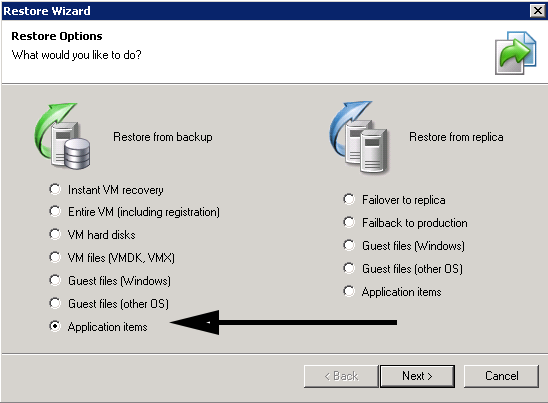
As we are going to restore files from within Exchange we must select Application items then select next.
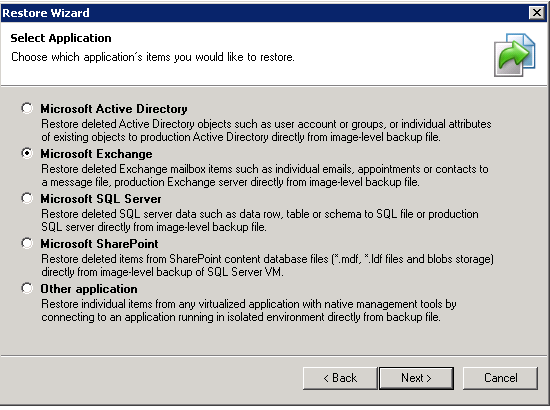
The next choice is fairly self explanatory, we are restoring an item from Exchange so select the Exchange option.
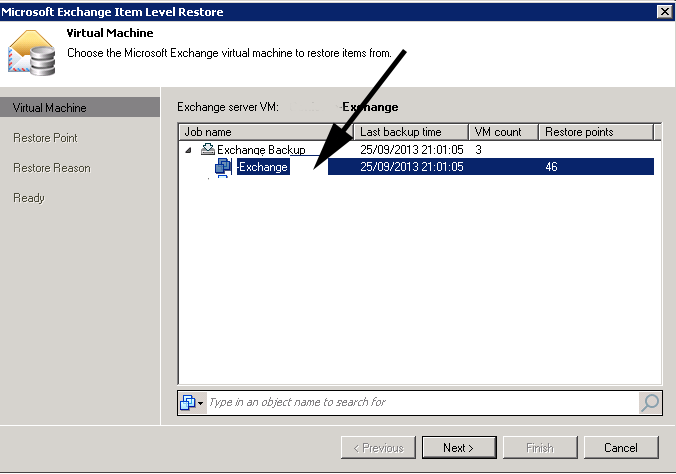
Next we see our Exchange backup job, select your job and then choose next.
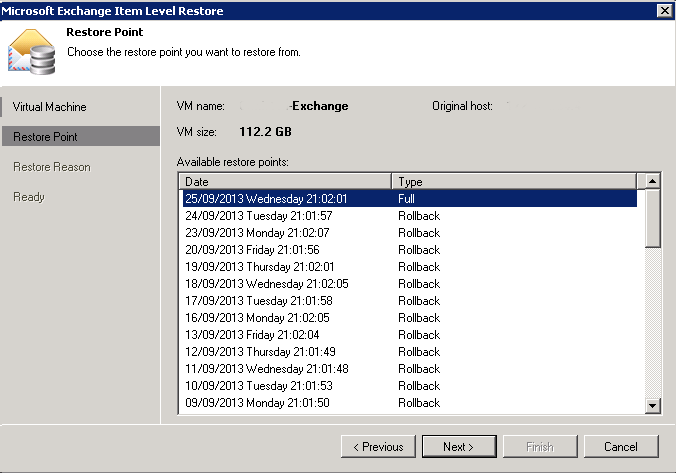
Finally things become interesting, depending on what you would like restore you now need to select the job with the relevant date and then click next.
Ill not screen dump the following screens but it is simply a screen which allows you to enter a reason for restoring the data you are doing so, so you can keep logs of your backup and restore activities. The following screen after can be confusing it is basically a summary screen of what you have setup, however it says finish, obviously we have not selected any data to restore yet, just the VM and job to use. Veeam need to change this in my opinion to say continue. Click next and Veeam Exchange explorer will launch in a moment or two. It takes time as while it launches it is mounting the backed up mailbox store so we can browse it, the larger the mailbox store the longer the wait.
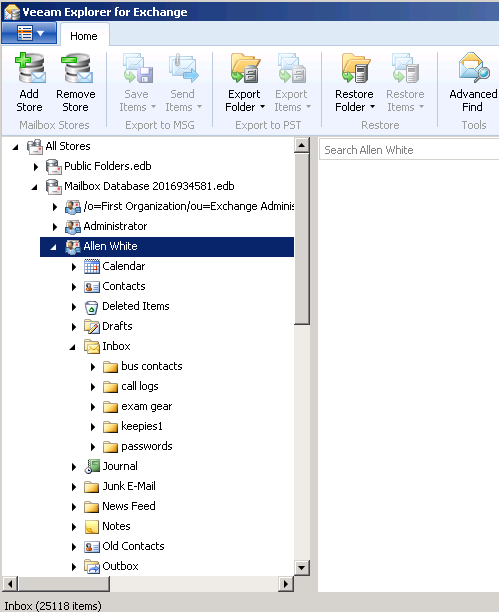
You will now see the Veeam 7 Exchange browser load, you can expand the Mailbox store to the relevant Mailbox You would like to restore from. As you can see below I have selected my mailbox and I can browse all my sub folders and email within these sub folders.
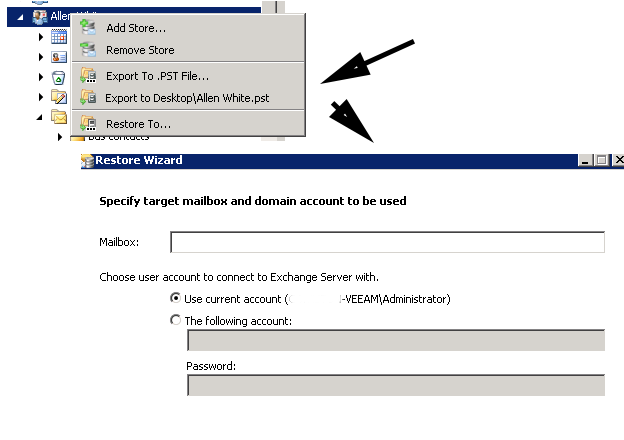
This is where it gets clever. Lets say we wanted to restore a whole Mailbox with Veeam 7 we would right click the mailbox in question and you will see the menu below. We can restore the whole mailbox to a PST so the user can manually import the mailbox back into Outlook. If you select “restore to” your get the option to restore the whole mailbox back to its original mailbox store, overwriting any data that is already there.
If we would like to restore an individual email in Veeam 7 then browse to the folder it is in and select the email in question. Again go ahead and right click it and you will see the options below.
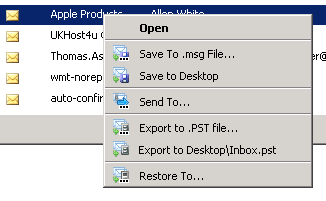 The options are fairly self explanatory but Save to desktop pop the email on the Veeam Servers desktop for inspection, “Sent to” forwards the email to a specified email address that you have setup in Veeam when setting up your SMTP settings, export to PST again pops the email in a PST file that you can import manually in Microsoft Outlook and the Restore To option allows to to restore the individual email to its original location on the live Exchange system.
Tags: Veeam7


